
You need to start by signing in through our admin area. You can find the login page here!
If you do not have a login to the admin area, please talk to the manager of your department about getting one.
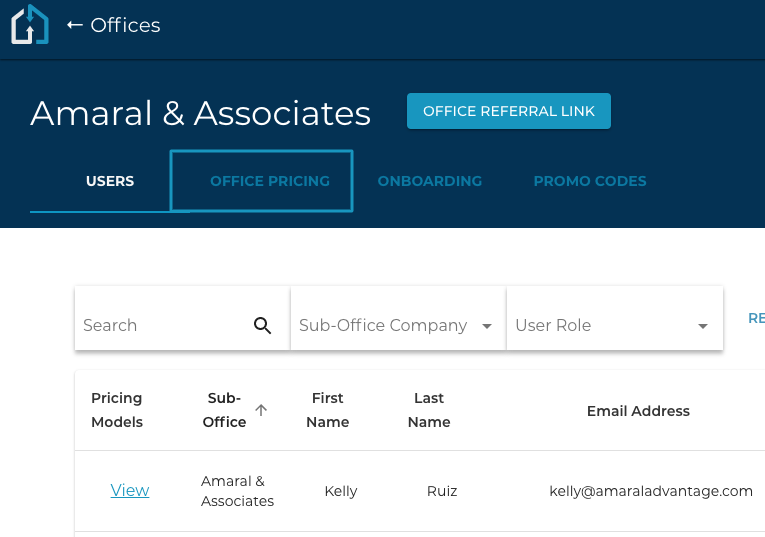
1. In the Admin Area you will click the Offices Tab and click into the Office that you are wanting to Edit the Credit Bucket for.

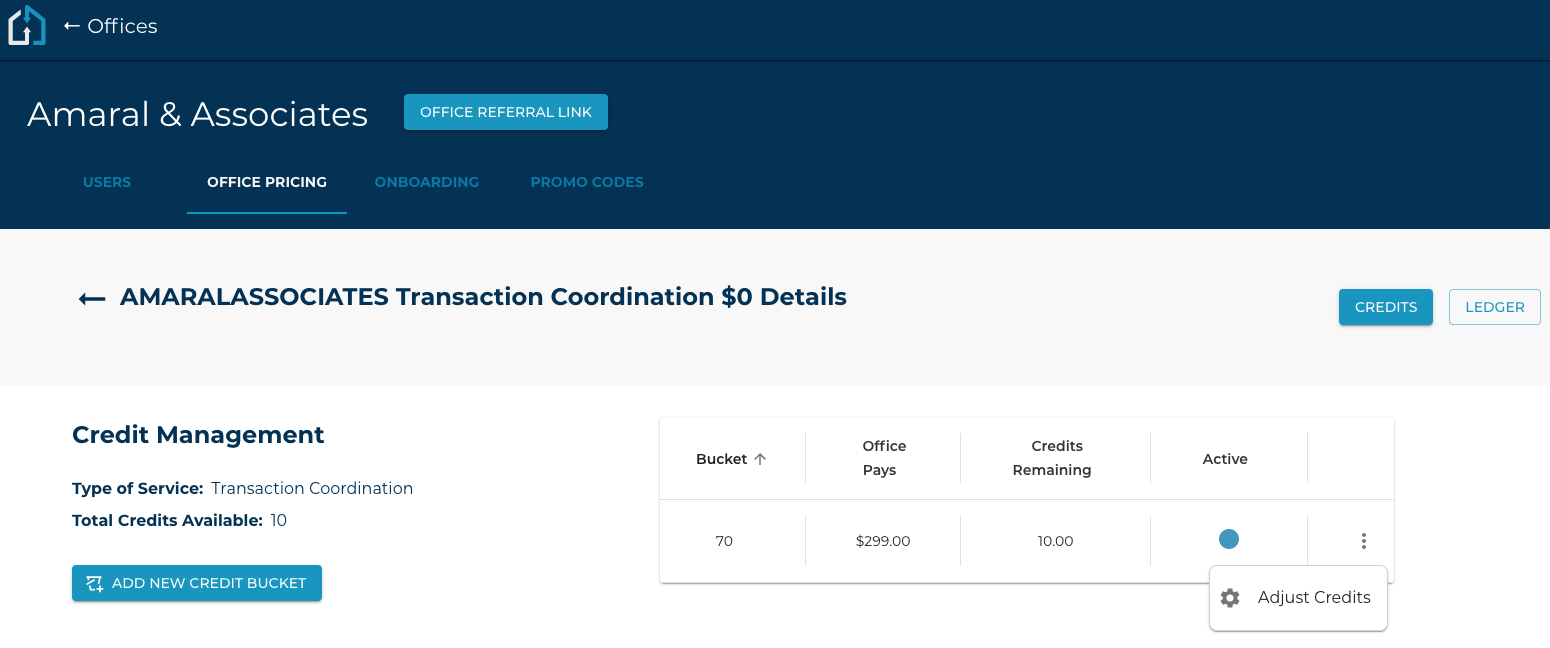
2. Within the Office choose the Office Pricing Tab and select the ellipsis at the end of the line, and select “Manage Pricing Model”.
3. Click on the ellipsis on the right side of the pricing model and select Adjust Credits
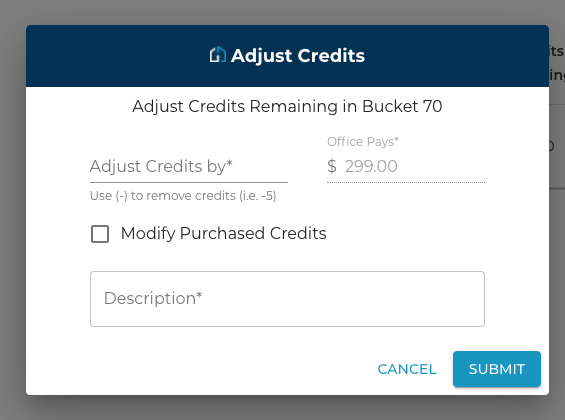
4. Enter the amount of credits to be adjusted along with a description of the change.
If this is a change to the number of purchased credits (i.e. A brokerage has bought more credits to refill) then make sure to check the “Modify Purchased Credits” checkbox. Finish this process by clicking Submit to confirm.
The Office’s Ledger will display the adjustment made to the Office’s Credit Bucket.